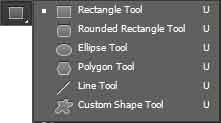
photoshop shape tools
Photoshop shape tools allow you to draw shapes, paths or even pixels in your document. It's highly useful when you need to create regular shapes like rectangles, rounded rectangles, ellipse, polygons or straight lines. It also provides you with the option to add custom shapes which you can choose from the photoshop library or download and load it into photoshop from online sources. YOu can also create a custom one and save it there to use in the futute.
Rectangle Tool
This tool makes it easier to create a rectangular shape on the workspace. The options are quite similar to the ones you can find in pen tools.
Options
Rectangle tool includes the options namely tool mode, fill, stroke, stroke style, width and height input fields, operations, alignment, arrangement, size constraints and align edges.

Shape Mode
Mode option allows you to choose between shape, path and pixels. Shape option lets you create a vector shape on your document while path option lets you make a selection path or a text path. Pixels option allows you to draw pixels on the active layer instead of creating a new layer for the shape. In that case, it won't be movable separately.
Shape Mode
If the shape option is selected, you'll be provided with options as listed below.
- Fill - lets you choose the fill color for your shape from the dropdown.
- Stroke - lets you choose the border color for your shape from the dropdown.
- Style - lets you choose the border style for your shape from the dropdown.
- Width and Height - Adding width and height in those input fields will make it easier to create a defined sized rectangle. Define the height and width for the rectangle and click on the document area. A confirmation dialog box will appear with the same measurements. Click ok to proceed. You can redefine the width and height of the shape that's already created with the rectangle tool using those input fields.
Path Mode
If the path mode is selected, you'll be provided with to use the shape as one of the options listed below, once the path is completed.
- Selection - lets you convert the path into selection area.
- Mask - lets you convert the path into layer mask and hide all the details outside of the path.
- Shape - lets you convert the path into shape.
Pixels Mode
If the pixels mode is selected, all the options will be disabled except the constraints and other options namely opacity and anti-alias will appear which control the transperancy and smoothness around the edges.
Path Operations
Similar to the selection options in selection tools, this option lets you choose to combine multiple shapes or paths, subtract, intersect, exclude and merge the shapes or paths. While paths are not added to layers panel but placed in their own separate paths panels, you can opt to create a new layer or add each shape in the same layer while working on shape mode.
Path Alignment
To work with path or shape alignments, you need to learn two more tools that'll help you to choose one of the shapes or paths from a combination.

Path Selection Tool
This tool allows you to choose one of the paths or shapes from a combination and then move it or align it to left, right or center of the document either vertically or horizontally or both.
Direct Selection Tool
This tool allows you to not only move or align the desired path or shape from the combination but also redefine the position of anchor points of those paths or shapes.
Path Arrangement
This option also requires the use of direct selection or path selection tool for arrangement of the shapes or paths within a combination. This option lets you move the shapes or paths forward or backward within the set so that you can move selected shape or path to the top of others or move it to the bottom.
Constraints
This option allows you to constrain the size of the rectangle. The options are explained below.
- Unconstrained - keeps the shape unconstrained which means you can draw a rectangle of any width and height.
- Square - keeps the shape constrained to square where you can only control the height of the shape and the width is adjusted automatically.
- Fixed Size - allows you to input definite height and width for the rectangle which will be used as the measurement next time you try to create one.
- Proportional - allows you to input a ratio for width and height of the rectangle that'll be the guideline for the next rectangular sahpe. In this case, you can only control the width of the shape while the height is automatically adjusted.
- From Center - makes the initial point where the mouse is clicked the center of the rectangle.
Align Edges
This option allows you to align the edges of your shapes with the document's pixel grids.
How to use rectangle tool?
Select the rectangle tool and define the options from the options bar. Either click and drag the mouse on the document area or simply click and fill in the height and width values in the dialog box that appears and the rectangle will be created. Simple click and fill option is highly useful when you need to create squares quickly.
Rounded Rectangle Tool
This tool makes it easier to create a rounded rectangular shape on the workspace. This tool offers an additional option on the options bar in comparision to the rectangle tool where you can define the radius value which is the amount of pixels the sharp corners will be deviated to create rounded ones. Higher the value of the radius higher the roundedness at the corners. Change this value once the shape is created won't affect the roundness of the shape created earlier.
Ellipse Tool
This tool makes it easier to create an elliptical shape on the workspace. The only difference on the options bar from rectangle tool is the constraint option circle in place or square whereas a circle can be obtained by filling up equal width and height on the dialog box that appears on click.
Polygon Tool
This tool makes it easier to create a polygonal shape on the workspace. The options which are different from the rectangle tool are explained below.
Constraints
This option allows you to define the radius i.e. the distance from the center of the shape to the outermost point along with an option to make the corners round. It also provides an option to create a star instead where the percentage to indent the sides of the star as well as the option to make the sides rounded are available.
Sides
This option allows you to define the number of sides you want in your polygon or star. Using this option, you can create shape of the sun with ease using polygon.
Both of these options won't affect the shapes that are drawn earlier.
Line Tool
This tool makes it easier to draw straight lines on the workspace. This tool also offers an additional option on the options bar in comparision to the rectangle tool where we can define the weight of the line shape being created which means the thikness of the shape. You can't change this value once the shape is created but can change it instead by adding a different value in the width field. The constraint option allows you to add arrowheads to the ends of the line along with the options to define the width and length of those arrowheads. You can also define the concavity or the inner depth of those arrow heads.
Custom Shape Tool
This tool allows you to draw a custom irregular shape in your document with ease using one of the shapes from the custom shape gallery of the application. An additional option namely shape is available on the options bar which displays a gallery of preloaded shapes on the dropdown. Selecting any one of them will cut out the effort required to create such shapes. You can load different set of shapes from the gallery or download one from online sources and use it by the use of settings gear icon on the top right corner of the dropdown.
Leave a comment