photoshop gradient and paint bucket tools
Photoshop provides two great and easy tools to fill up colors in the document namely gradient tool and paint bucket tool. Though looks quite simple, these tools can give you a whole new experience with their options.
Gradient Tool
Apart from filling an empty background with varieties of gradient backgrounds, this tool can be used in combination with layer mask to blend composite images with great ease.
Options
This tool provides you with regular options like blend mode, opacity and transparency which we explained in earlier lessons along with a few more options that you'll find listed below.

Gradient Picker
This option allows you to choose your desired gradient fill from the dropdown. You can opt to load other collections from the library or download some from online sources and use it in the document. You can also create your own custom gradient mix. All you need to do is click on the settings gear icon on the top right section of the dropdown and make selection from the options. You can also click on the gradient bar itself that'll make a gradient editor dialog box as shown below.
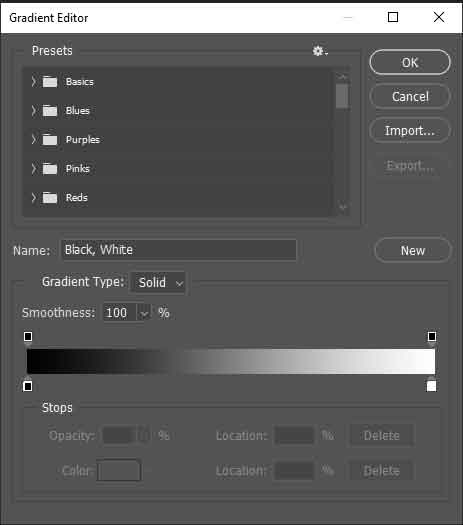
You can redefine the opacity and color from the handles on the selected gradient bar at the bottom of the dialog box. You can also define the gradient type from smooth and noise as well as redefine the roughness of the gradient. Furthermore, you'll find option to control the saturation and noise transperancy of the gradient.
Gradient Style
These style options allow you to choose the orientation of the gradient. The options available are:
- Linear Gradient - adds gradient shades from end to end in a straight line.
- Radial Gradient - adds a gradient shade as a circle at the start point covered by other shades in a circular path around the first shade.
- Angled Gradient - adds a gradient shade in an angular path from the start point.
- Reflected Gradient - adds symmetric linear gradient on either side of the starting point.
- Diamond Gradient - addds a gradient shade in the pattern of a diamond.
Reverse
This option simply reverses the colors used in the gradient.
Dither
This option reduces the sharpness of the colors at the meeting points and helps to blend them properly.
How to use gradient tool?
Click and drag the gradient tool within the document with desired options selected to define the start point and reease your mouse to define the end point. The appearance of the gradient is totally dependent on the distance between the start and end point along with the selected options. To confine the effect of gradient within a space, you need to make selection of the target area with one of the selection tools or else it'll fill the entire document.
The most important thing to remeber while using gradient tool is that you can't add gradient fill on a vector layer that may be a text layer or a shape layer. Instead, you'll need to rasterize them or add a layer mask to those layers. Either go to Layer » Rasterize or right click on the layer in the layers panel and choose Rasterize Layer to those layers rasterized or converted into normal layers in easy words.
Paint Bucket Tool
Paint bucket tool is another photoshop tool that allows you to fill a layer with colors while filling layers with patterns is also an option.
Options
Paint bucket tool also contains some regular options like blend mode, opacity, tolerance, anti-alias and contiguous which are explained in earlier lessons. Lets have a look on the other options.

Source
This option allows you to choose between foreground color form the color pallette and the pattern as the source for filling. If pattern is selected, the dropdown menu for patterns will be enabled from where you can chose the patern which you want to use as the source for filling.
All Layers
This option allows you to fill the source content in all the visible layers based on the color range of the area where the paint is applied.
How to use paint bucket tool?
Simply, select the paint bucket tool with desired options selected and clik on the document layer to get the layer filled with defined color. If you need only a section filled within the layer, make a selection around the target area and then apply the fill.
Leave a comment