photoshop pen tool
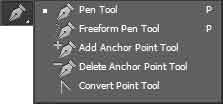
Photoshop pen tools group consists of variations of pen tool namely pen tool, freeform pen tool, add anchor point, delete anchor point and convert point tool.
Pen Tool
Pen tool is higly useful in photoshop which lets you create irregular shapes or paths in the document that is not possible with the use of custom shape tool. It's mostly used to create logos and irregular text paths.
Options
Pen tool includes the options like tool mode, fill, stroke, stroke style, width and height input fields, operations, alignment, arrangement, rubber band, auto add/delete and align edges.

Pen Mode
Mode option allows you to choose between shape and path while the pixels option is disabled. Shape option lets you create a vector shape on your document while path option lets you make a selection path or a text path.
Shape Mode
If the shape option is selected, you'll be provided with options as listed below.
- Fill - lets you choose the fill color for your shape from the dropdown.
- Stroke - lets you choose the border color for your shape from the dropdown.
- Style - lets you choose the border style for your shape from the dropdown.
- Width and Height - Unlike the width and height options in marquee tools, this option only works once the shape is created. You can redefine the width and height of the shape that's already created with the pen tool.
Path Mode
If the path mode is selected, you'll be provided with to use the shape as one of the options listed below, once the path is completed.
- Selection - lets you convert the path into selection area.
- Mask - lets you convert the path into layer mask and hide all the details outside of the path.
- Shape - lets you convert the path into shape.
Path Operations
Similar to the selection options in selection tools, this option lets you choose to combine multiple shapes or paths, subtract, intersect, exclude and merge the shapes or paths. While paths are not added to layers panel but placed in their own separate paths panels, you can opt to create a new layer or add each shape in the same layer while working on shape mode.
Path Alignment
To work with path or shape alignments, you need to learn two more tools that'll help you to choose one of the shapes or paths from a combination.

Path Selection Tool
This tool allows you to choose one of the paths or shapes from a combination and then move it or align it to left, right or center of the document either vertically or horizontally or both.
Direct Selection Tool
This tool allows you to not only move or align the desired path or shape from the combination but also redefine the position of anchor points of those paths or shapes.
Path Arrangement
This option also requires the use of direct selection or path selection tool for arrangement of the shapes or paths within a combination. This option lets you move the shapes or paths forward or backward within the set so that you can move selected shape or path to the top of others or move it to the bottom.
Rubber Band
Lines of shapes or path are invisible by default until the next anchor point is defined but you can preview those lines by enabling the rubber band option that is available as a dropdown on click of the settings gear icon on the options bar.
Auto Add/Delete
This option allows you to add anchor points within the path or delete an anchor point on click when you are on the process of creating it.
Align Edges
This option allows you to align the edges of your shapes with the document's pixel grids.
How to use a Pen Tool
- Select the pen tool with desired options selections from the options bar.
- Click on any area of the document to start a shape or path.
- Click on other areas to create more anchor points or corners of the shape or path and click again on the start point to complete the shape or path.
Freeform Pen Tool
This tool allows you to create shapes or paths using freehand drawing curves while the standard pen tool draws shape with straight lines. This tool also provides you an additional option named Magnetic which lets you stick to the color range of the subject on the layer below while drawing shapes or paths.
How to use freeform pen tool?
Select the freeform pen tool with desired options and then click and drag your mouse to create a shape or path just like you'd do with a pencil on a paper.
Add Anchor Point Tool
This tool allows you to add anchor points in the shape after completion of the drawing that makes it easier to create curves. Multiple curves in a straight line won't have been smoother without this tool. This tool provides no additional option on the options bar.
How to use add anchor point tool?
Click on add anchor point tool after creating shapes or paths. Move the cursor over the lines of the shape or path and you can see a plus sign on the cursor. Click on the line wherever you want a curve and then click and drag the anchor point itself or the handles on either side to control the curve.
Delete Anchor Point Tool
This tool allows you to delete an unwanted anchor point from the shape or path. This tool provides no additional option on the options bar.
How to use delete anchor point tool?
Simply, select the delete anchor point tool and hover your mouse over the anchor points. You'll see a minus sign on the cursor. Click on the anchor point you want to delete.
Convert Point Tool
This tool allows you to convert smooth anchor points into corners and vice-versa. This tool too provides no additional options. You can get this tool automatically with the pen tool selected, if you move your mouse over the anchor points and hold the ALT key.
How to use convert point tool?
Select the convert point tool and click on any anchor point you want to convert. If it was a corner point, the anchor handles will appear which you can move to convert the corner into a curve and vice-versa.
How to create curves with the pen tool only?
You can create curves with the use of pen tool only as well. Simply define the starting point and then on the next anchor point click and drag your mouse immediately. You'll see the handles appear which you can turn on either sides to get the desired curve.
But once you leave the path and go with the curves, you need to hold the ALT key and click on the recent anchor point to continue. This will convert the current anchor point corner point and disable the handles which won't affect your next curve. End the shape or path by clicking on th initial anchor point and you're done.
How to trace objects from and image using pen tool?
Using pen tool to trace objects with irregular shapes like logos is quite common and an easy way to make selection. Simply, select the path mode and create path around the object. After the completed, select make selection option and define the feather radius if you want some softening on the edges or leave it as 0. Press OK and the selection is done. You can use layer via cut or copy option to get it duplicated or simply hit CTRL + J on your keyboard which will create a duplicate of the selection area as a new layer.
Leave a comment