wordpress basics
WordPress is an easy to use content management system based on PHP and MySQL that you can get on with even if you are not an it professional. You can download the wordpress backend application for free on online sources and integrate with great website design themes that are free or buy a premium theme for yourself. All you need to do is integrate these two files, create a database to store your website contents and add posts and pages using the wordpress dashboard to get it displayed in the frontend for your visitors. Adding a contact form to interact with those visitors and getting your site optimized for the search engines would be a plus. Let's see what we can do with it.
GET WORDPRESS
The first thing you'll need to create a website in wordpress is the wordpress sysytem files. You can download it from its original site that keeps updating the version and adding new features all the time. You can directly download latest wordpress system files from the cpanel if you're working on live server whereas you should download those files from original site of wordpress and place it in xampp/htdocs directory to work on local server.
Learn Wordpress Basics
WORDPRESS CONFIGURATION
Once those files are downloaded, you can send the base URL request in the browser to proceed further. We are naming this project as wptuts, so, the url request we'll be sending to the browser would be localhost/wptuts. And this url will redirect you to the step by step configuration settings pages.
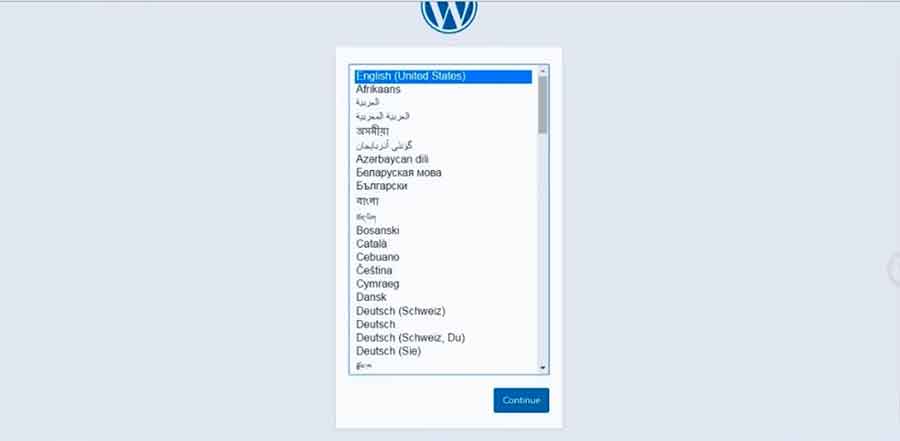
Select the language you'd prefer and click on continue. A welcome message box will appear on the screen that asks for the database name, username, password, host name and the table prefix that'll be wp_ by default if not defined.

Wordpress system will try to create a wp-config.php file in the root directory with those database informations. If the file is created that's all but if not, you need to add those details manually in wp-config-sample.php page and save it as wp-config.php.
/** The name of the database for WordPress */
define('DB_NAME', 'wptuts');

/** MySQL database username */
define('DB_USER', 'root');

/** MySQL database password */
define('DB_PASSWORD', '');

/** MySQL hostname */
define('DB_HOST', 'localhost');
Before clicking on the Let's Go button, lets create a database and name it wptuts in our database.
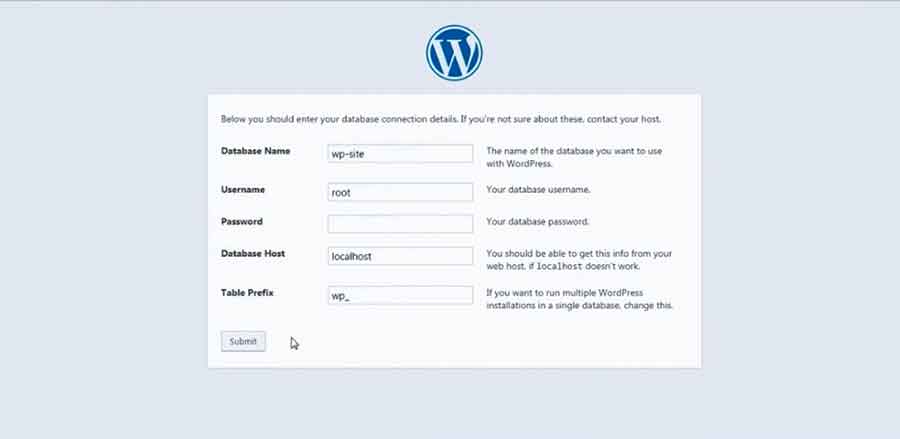
After the database is created, we can click the Lets go button that'll take us to the forms page where we need to add the above stated database details. The default username for database would be root and the password field will be empty as we don't have password protection in our database by default. After filling up the details, we can click the submit button.
Wordpress will ask us to run the worpress installation process. Click on Run the install button and a new page will appear asking for the site title and username for the dashboard. The random password string is generated automatically which you can use or change. If you'd like to use the same password, save it somewhere so that you can get it anytime you need it. Then the email address field and the option to turn off search engine indexing.
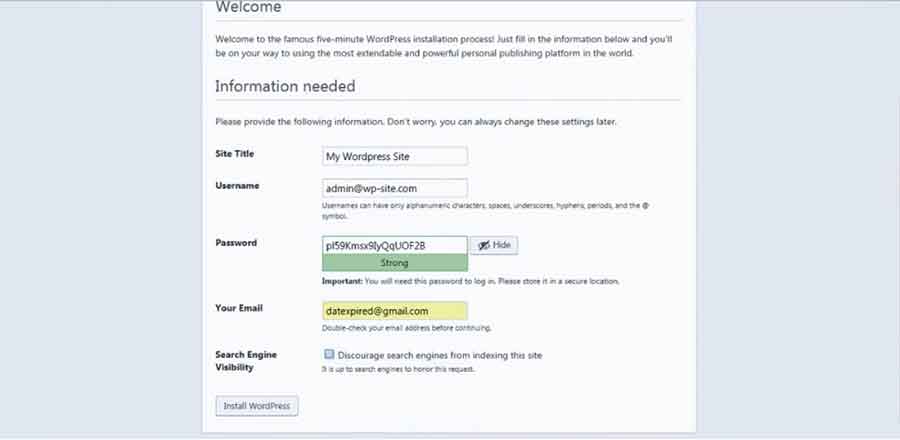
Fill up the form and click on Install Wordpress button.
A success message will be displayed with the button to login to the dashboard. Click on that Log In button and add the login details we just created in the login form that appears to go to the dashboard.
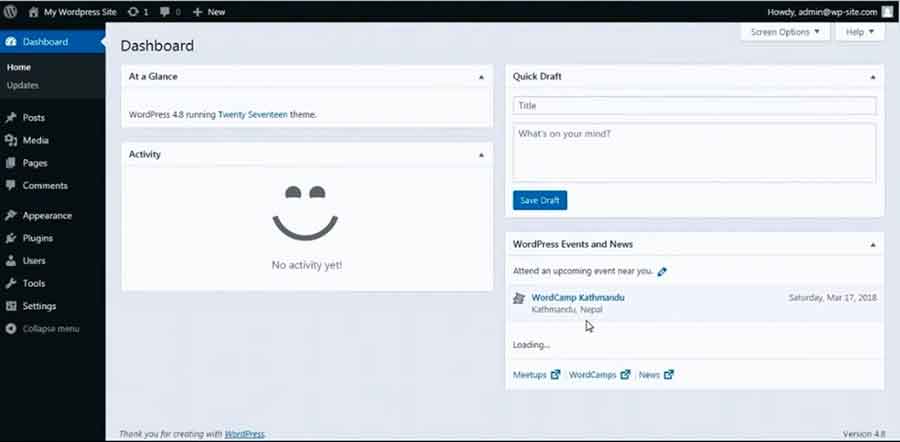
LOG IN TO DASHBOARD
Once you click the log in button after entering login details, you can see the dashboard from where we'll create a beautiful cms website.
You can see how your website looks right now by clicking on your chosen site title being displayed on the left top section. Have a look at it before we proceed further.
CHANGE THEME
If you didn't like the design, you can replace the theme currently active. For that, you need to go back to the dashboard form the dropdown under the site title and select Appearance/Themes option. For this tutorial, we'll choose a magazine theme named COLORMAG. Click on Add New button on the top which will redirect you to another page with a lot of themes on display. Since, we're going for colormag theme, we'll download it separately and upload its zip file via the Upload Theme button. If you want to use any theme from those being displayed, you can simply click on the install button of that theme.
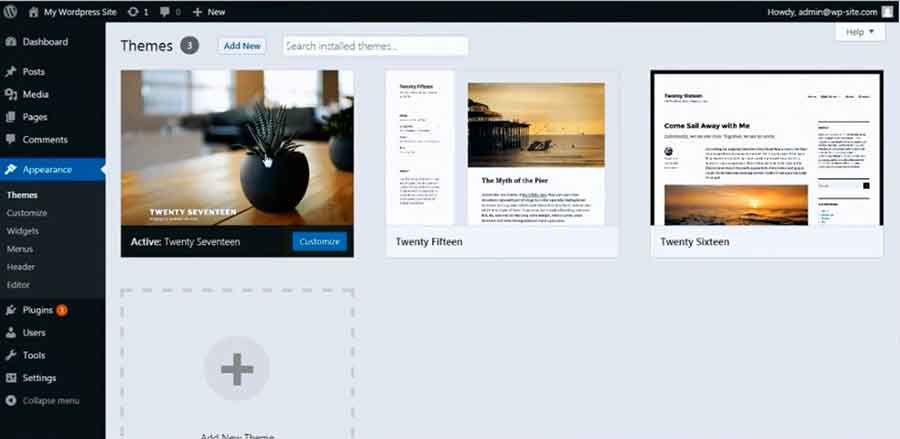
Once the theme is installed, click on the Activate Theme option to activate it.
If you are working on a theme with static front page design, you ned to go to the Settings/Reading option in dashboard and change the Front page displays option to the samle page to see the design in frontend that you saw on the theme's screenshot. If it's a magazine theme or news theme that's going to have a lot of posts, stick to the Your Latest Post option that'll look good once we add a few posts.
ADD CATEGORIES
The basics is done now. Since we are working on the magazine theme, we'll have a lot of posts under the same news category. So, we'll add a few categories for the posts first. If it was an information site with limited contents, we'd add pages straight away.
Click on Posts/Categories option on the dashboard navigation panel. Wordpress will take you to the category page with forms to add categories on the left and the table to display added categories on the right. Lets add a few category titles there.
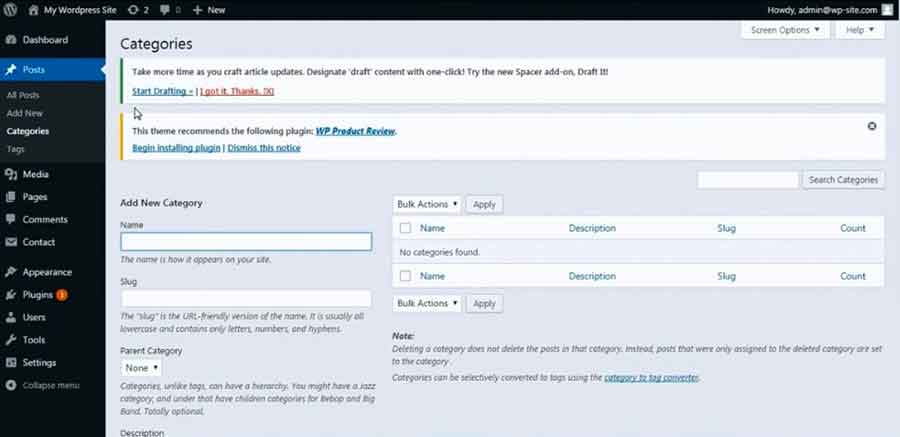
The slug field asks for the category titles with letters, numbers and hyphens only. The parent category asks if the category being added is the child category of any categories created previously that'll determine the dropdown menu contents and is completely optional while the description field is there to provide information about the category to all the users who access this page to add, edit or delete categories.
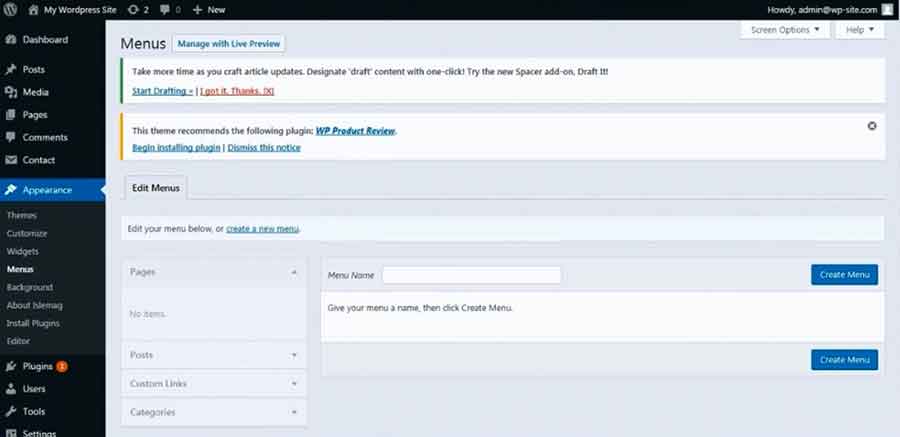
CREATE MENU
The categories are added now, we can create a menu to display those categories in the frontend. Click on Appearances/Menus option and the page to create menus will appear. On the left, you can see all the pages, posts, custom links and categories that has been created while the field to define the menu name and the section to arrange the menu titles is on the right.
Click on the Categories panel on the left side of menu page and go to the View All tab to see all the categories form the database. Select the ones you want to add in your menu and clik the button Add to Menu. All the selected categories will appear in the menu section on the right side. you can remove the ones you don't want form that section by clicking on the down arrow on the far right of the menu title box that'll display the remove link in the panel that slides down with the click. You can re-order the menus by dragging and droping methodse.. Finally, click on the Save Menu button to save the menu.
You might need to define the location of the menu before creating one. That depends on the theme. Refresh the frontend browser to see the changes.
ADD POSTS
Now, we can add a few posts to display them on the frontend. Click on Posts/Add New option and a form page to add posts wil appear.
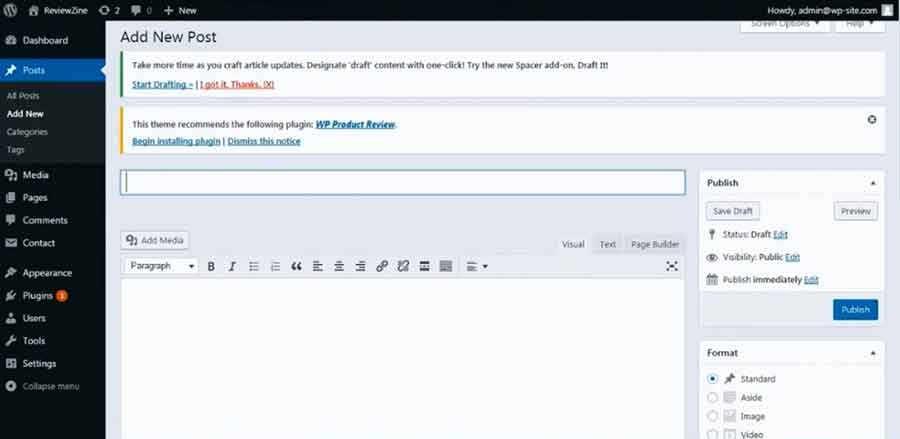
The title field for the post being added is on top while the button to add image on the textarea as well as the description textarea section is below it. On the right, you can see the options to preview the post or save as draft. Then the option to make it publicly visible and the button to publish the post. Below it, you can see the post format options, that define the content in the post. We'll keep it standard as of now. Below the post format section, we can see the list of categories that we added previously from where we can select one or more categories the post belongs to. Then comes the tags section where we can add multiple tags for the post that act as keywords for search engines. Then the layout option to choose the layout while displaying the post. The last section on the right is for the featured image for the post that'll open a pop up box from where you can upload images or select the image that you uploaded previously. We'll add some posts now.
FRONTEND CUSTOMIZATION
Once you added a few posts or pages for the site, you can go to the frontend click on customize from the top bar or you can click on Appearance/Customize to enable the customization panel for frontend. The customization panel varies with each theme but the basics remain the same.
All themes have a link to their documentation for the customization of the active theme in this panel. You can go through the documentation and customize the frontend as much as it allows.
Site Identity This option will let you modify the site title and tag line as well as allow you to add logo in the header section and a site icon.
Color Most of the themes allow you to modify the color combination used in the frontend.
Menus You can change the contents and location of the menu from here as well.
Widgets If your frontend page uses a lot of widgets this option would be available in the customization panel. In colormag's case, all the slider and category news sections are generated using widgets. So, there'll be a lot of widget options. Similarly, the footer section also contains multiple widgets in this theme.
Static Front Page This option allows you to choose either you want to display a static page or the latest posts in the home page.
Additional CSS Most of the themes allow you to add additional css from customization panel too while you need to fo to the Appearances/Editor option in dashboard to add css for others.
Header Options This option allows you to customize the contents present in header section.
Social Options This option allows you to customize the social sites' links present in the page.
Footer Options This option allows you to customize the contents present in footer section.
PERMALINKS
Now, the website is almost complete except for the url for categories and posts looking quite clumsy. We can create a clean url for those pages easily.
Click on the Settings/Permalinks from dashboard navigation which will take you to the page where multiple url structures are listed. Choose the option Post name whih will give you the shortest and the cleanest url.
CONTACT FORM PLUGIN
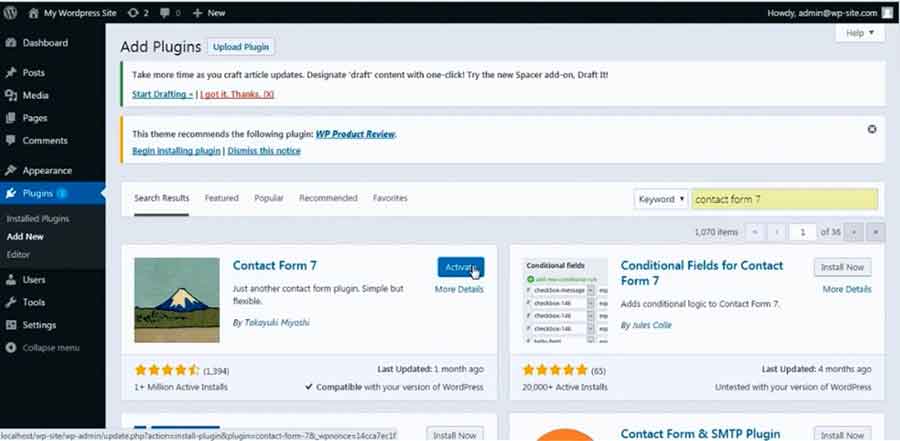
If you need to add contact form in your site, you can add the easiest and free of cost plugin for the same named Contact Form 7. Go to Plugins/Add new and type contact form 7 in the search bar and install and activate it.
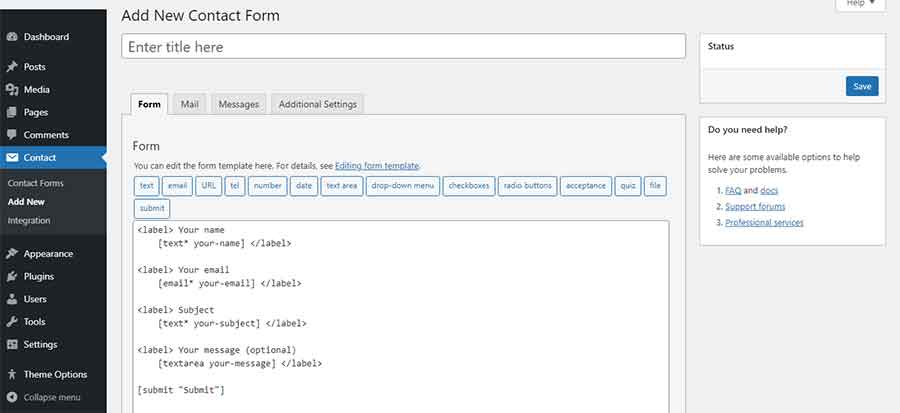
Once you activate the plugin, you'll see the Contact option in the dashboard navigation. Click on Contact Forms option to see the shortcode for the form that you need to copy and paste in a page to place the contact form in that page.

To add page go to Pages/Add New and enter the title which would be contacts or contact us generally. Then you need to go to the Appearances/Menus and add that page from the left hand side Pages panel to the existing menu so that it appears alongside other page / category titles.
The default contact form 7 form includes the basic input fields for name, email, subject and message section along with the send button. If you want to create a custom one you can go to Contact/Add New option and create your own contact form by giving it your own name and using the options available.
Once you're done, click on save and see the contact forms option to see a new form added there along with the shortcode. Paste that shortcode in your contact page and it's done. The last option in the Contact menu is the integration that allows you to add captcha in your page to prevent scams and abuses. You can see the plugin's documentation for detailed information along with instructions.
SEO PLUGIN
It's much better to have your site optimized for search engines. One of the best ranked and free of cost SEO plugin for wordpress is Yoast SEO that is simple and easy to use. Go to Plugins/Add New and searh for the Yoast SEO plugin using the search bar and install and activate it.
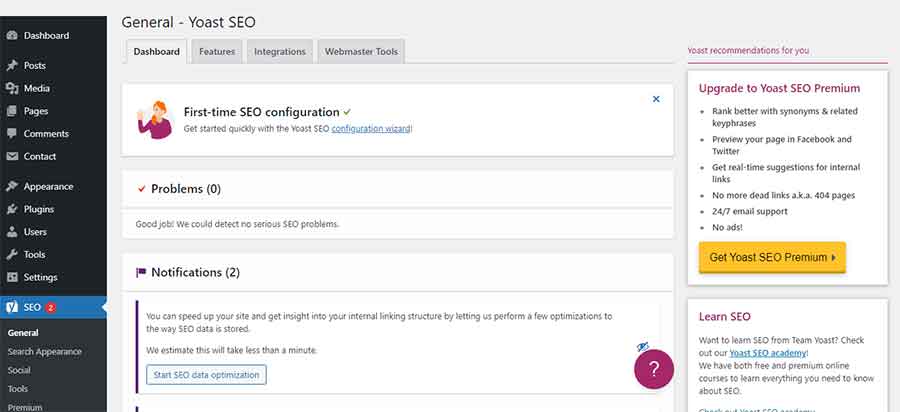
Once this plugin is activated, you can see the SEO option in the dashboard navigation. Click on the SEO/Dashboard option to configure the SEO settings for yourself that'll help you to verify and submit your site to serach engines. You can also view the google search console information from dashboard once you add the google verification code in the page Search Console under the SEO menu.
Leave a comment