How to move wordpress site from localhost to live server ?
Even though you have been working on other PHP frameworks or custom ones while creating applications, you might face a few tricky issues while moving wordpress sites from local server to live server. The basic reason for this issue is that the wordpress database contents store site URLs while being inserted into database tables and these URLs won't get automatically updated while moving the site. If that's your case, you can go straight to step 5 whereas step 1 to step 4 contains instructions for beginners to export local database and move it to that of live server. Let's start form the first step then.
Step 1: Upload Wordpress Files to Live Server
Once you purchase a domain for your site and a hosting plan too, you'll get the login details for your cpanel. First of all, you must update your domain with the DNS address provided by your hosting provider to make your website available on the internet.
Here's an example of a cpanel.
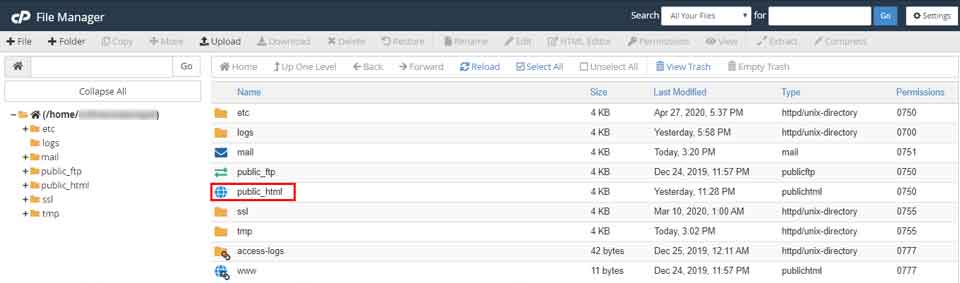
Open your cpanel using those details and go to File Manager / public_html folder and upload your project files there. Uploading each files from local server to live server would be ridiculously time consuming so compress your project files into a zip file and upload it.
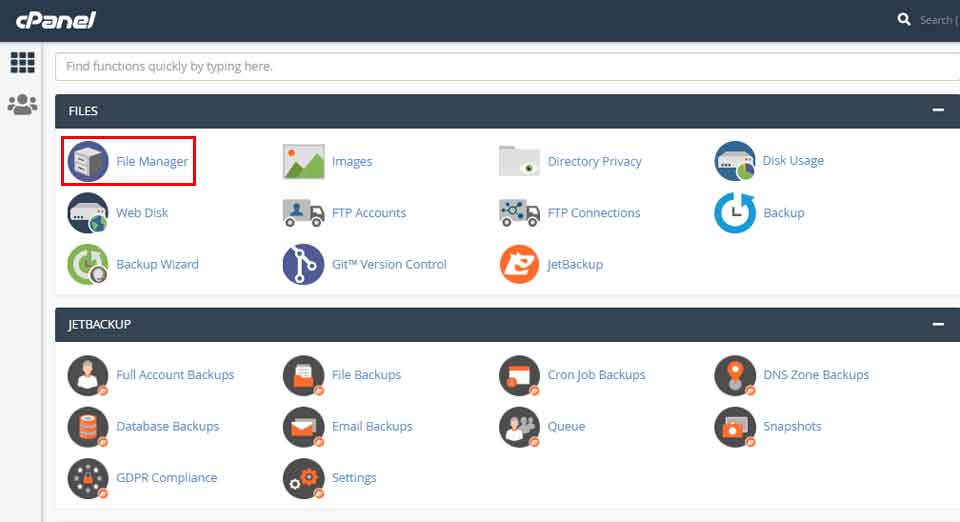
Once uploaded, you can extract those files in the same location and it'll be done.
If you entered your website URL in the browser at this phase a message will be displayed showing Error in establishing database connection because the database you've defined in your wordpress configuration file won't be found in the live server. Let's see what we need to do for the database then.
Step 2: Create New Database in Live Server
Live servers don't allow you to directly move your existing database but only the tables. So, you need to create a new database and import the database tables you have in your local server.
Here's the cpanel interface from where you should create a new database.
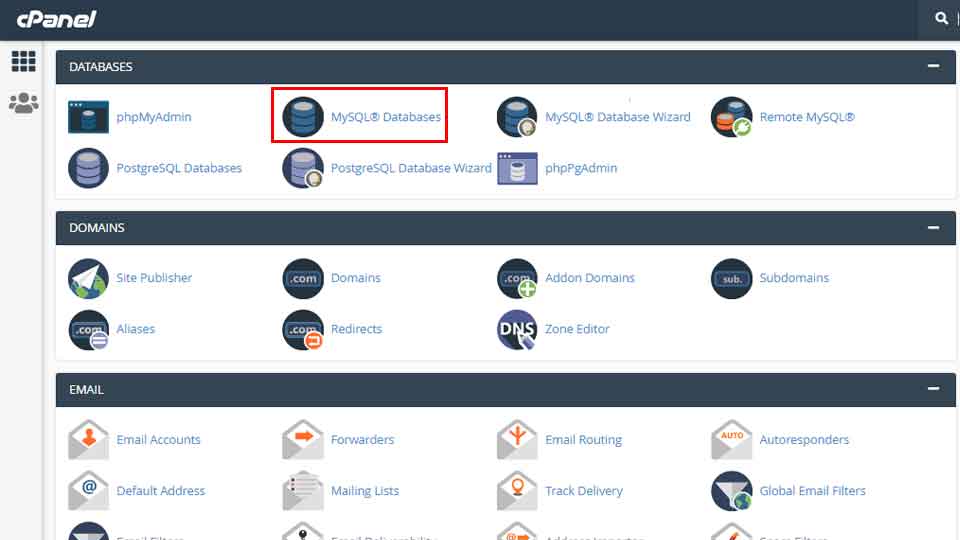
Click on the MySql Databases icon on your cpanel's main page. Enter a name for your database while the prefix would be provided by the server. Click on Create Database button and a new database will be created.
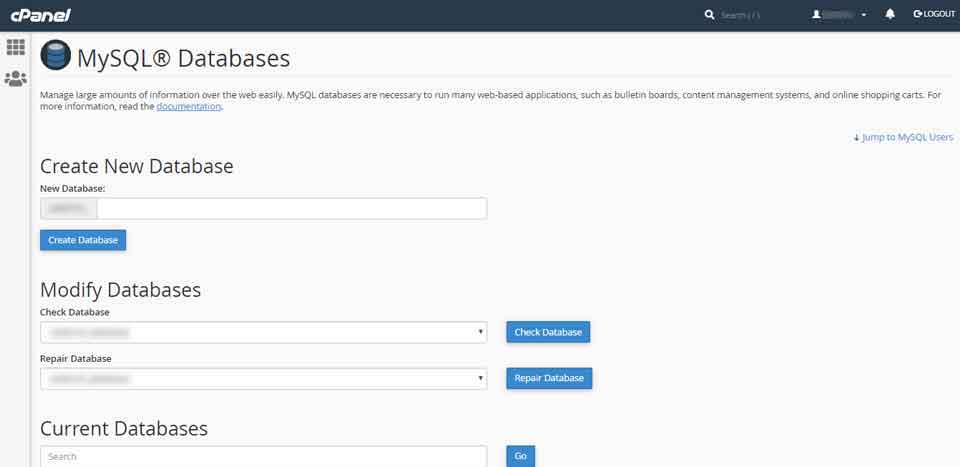
You also need to create users to allow access to that database.So, scroll down to the MySQL Users section and create a user.
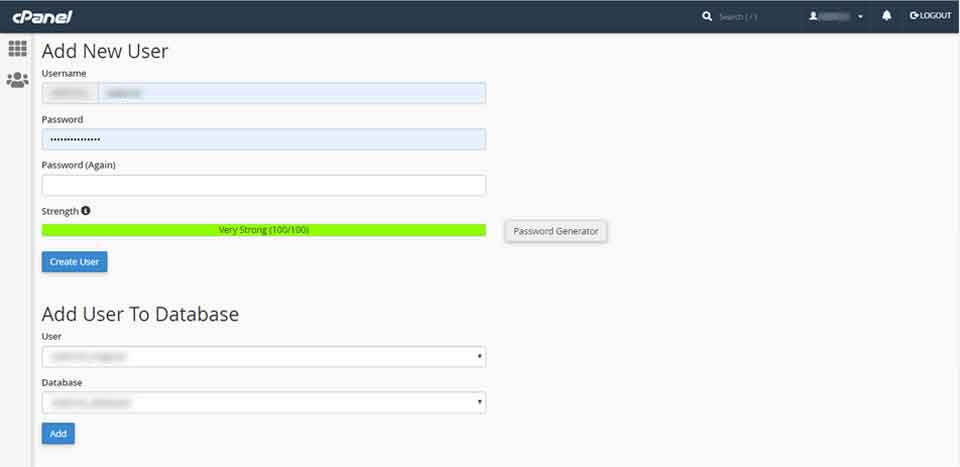
You should also add the user to the database. So, select the database and the user you want to add to your database and click on the add button. A dialog box will appear prompting you to select the privileges you want to provided to the user. Make sure all the privileges stated there are checked. Click on the Make Changes button and the user will be added to the newly created database with all privileges.

Open your wp-config.php file and update the DB_NAME, DB_USER and DB_PASSWORD fields to allow connection between the wordpress application files and its database.
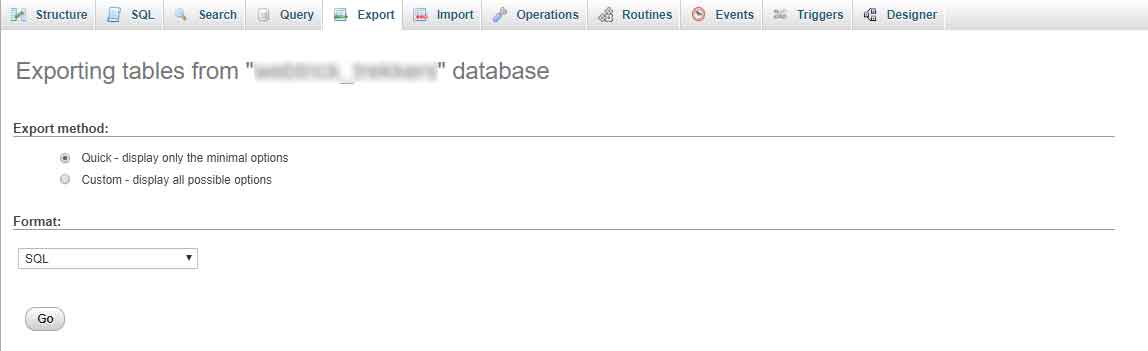
Step 3: Export Local WordPress Database
Now, you can move your database tables to the database we just created. Open your local database generally https://localhost/phpmyadmin, open your project's database and click on the Export option available on the top section of the menu bar. Chose Quick method and click on the Go button and that'll initiate the downloading of your project's database file.
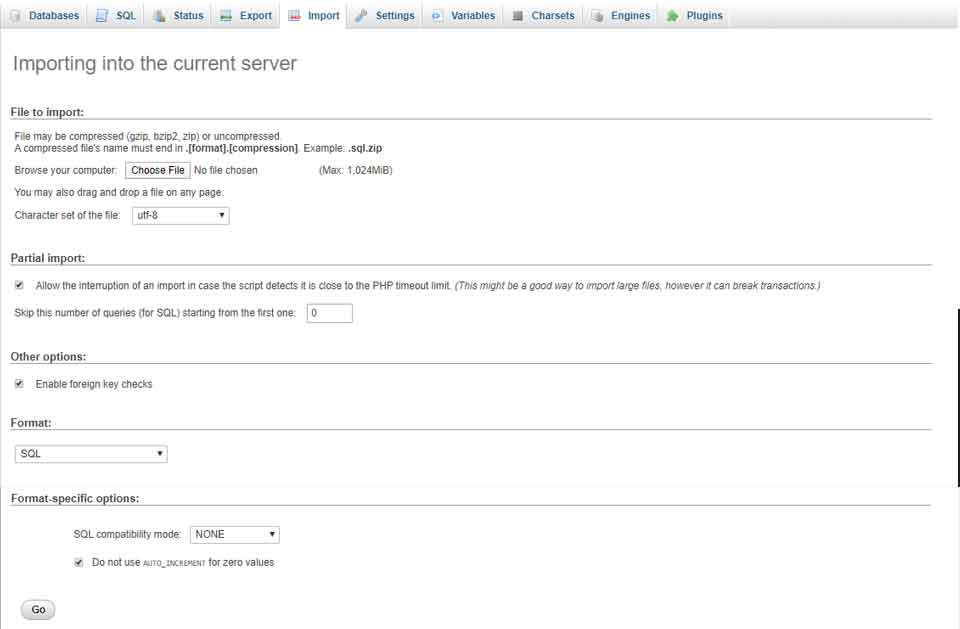
Step 4: Import Local Database to Live Server
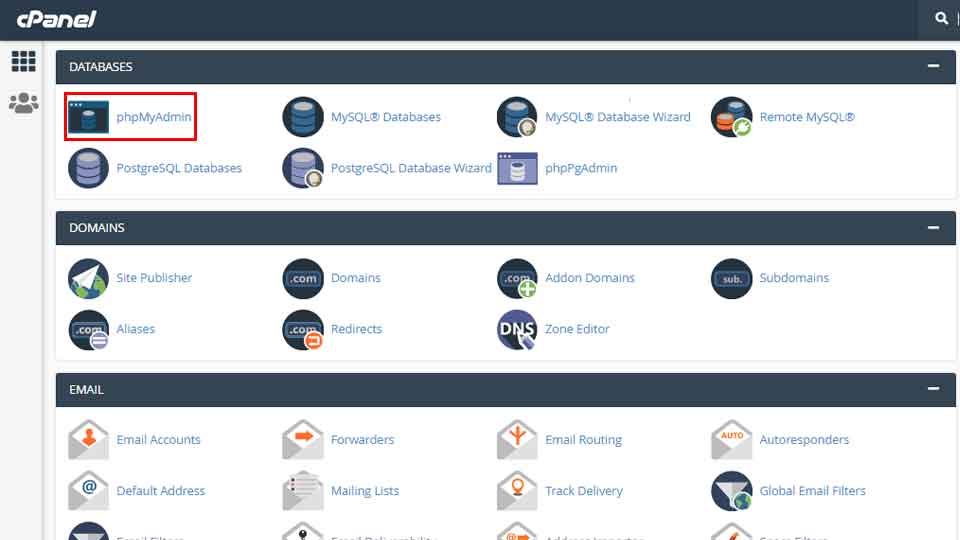
Once the download is complete, go to your live server's cpanel's main page and click on the PhpMyAdmin icon and that'll take you to the live server's database.
Click on the database you just created in step 2 and your project's new database will be opened. Click on the Import option on the top and select the local database file you just downloaded using the Choose File button. Click on Go button and your database file will be imported.
Step 5: Change Site URL
Click on your wp_options table or yourprefix_table in case you've changed the prefix. Replace the URLs present in option_value column for the row with option_name value siteurl and home with your sites URL. The existing values in those fields will be https://localhost/yourprojectname which need to be replaced by by your site URl something close to https://www.yourdomainname.com.

Either double click on the field value and replace the values directly or click on the edit icon on the far left for the respective row and replace the values in the option fields that appears and click on the Go button below.
Step 6: Fix Broken Links
As stated earlier, the wordpress table contents store site URLs within the posts so you need to edit those URLs. Unlike the options table, these posts tables might contain a huge number of posts and number of links in a single post as well. So, it won't be practical to edit each of them one by one. Instead, you can use a SQL query to edit all of them at once within a split second.
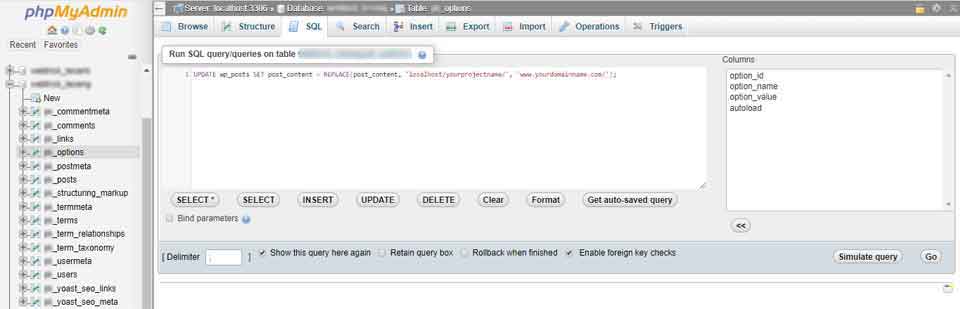
Click on the SQL option on the top menu and paste the query stated below. Make sure you've replaced the prefix wp if you've your own prefixes and replace the yourprojectname phrase with the foldername of your application in local server while yourdomainname.com is replaced by the domain name and it's extension that you purchased for the site.
UPDATE wp_posts SET post_content = REPLACE(post_content, 'localhost/yourprojectname/', 'www.yourdomainname.com/');
Step 7: Set Up Your Live Site
Login to your wordpress dashboard and go to Settings » General and click on Save Changes button. Do the same for Settings » Permalink too without making any changes to ensure that all post links work fine.
Now, you can see your wordpress site running smoothly on live server.
Leave a comment